
Greetings! In today's blog, we're excited to guide you through the process of effortlessly extending your studio backdrop using the cutting-edge AI Generative Fill feature in Photoshop. Make sure you have the recent Adobe Photoshop update to access this feature.
At CameraStuff, we take pride in offering a diverse range of 1.38m wide paper backdrops. While these are perfect for portraits and smaller products, they might feel a bit too narrow for capturing full-length body shots. Traditionally, photographers relied on the clone tool to painstakingly extend backdrops—a time-consuming process that required precision.
Now, with the revolutionary Generative AI feature in Photoshop, this task has been streamlined, allowing you to achieve seamless backdrop extensions with just a few clicks. Let's delve into how this innovative tool can elevate your photography game, providing a swift and efficient solution for creating stunning full-length shots without the hassle.
Let's Set it Up
We've recently welcomed a new member to the Camerastuff family, our fabulous yet unnamed mannequin. We'd love your creativity to shine by suggesting the perfect name for her.
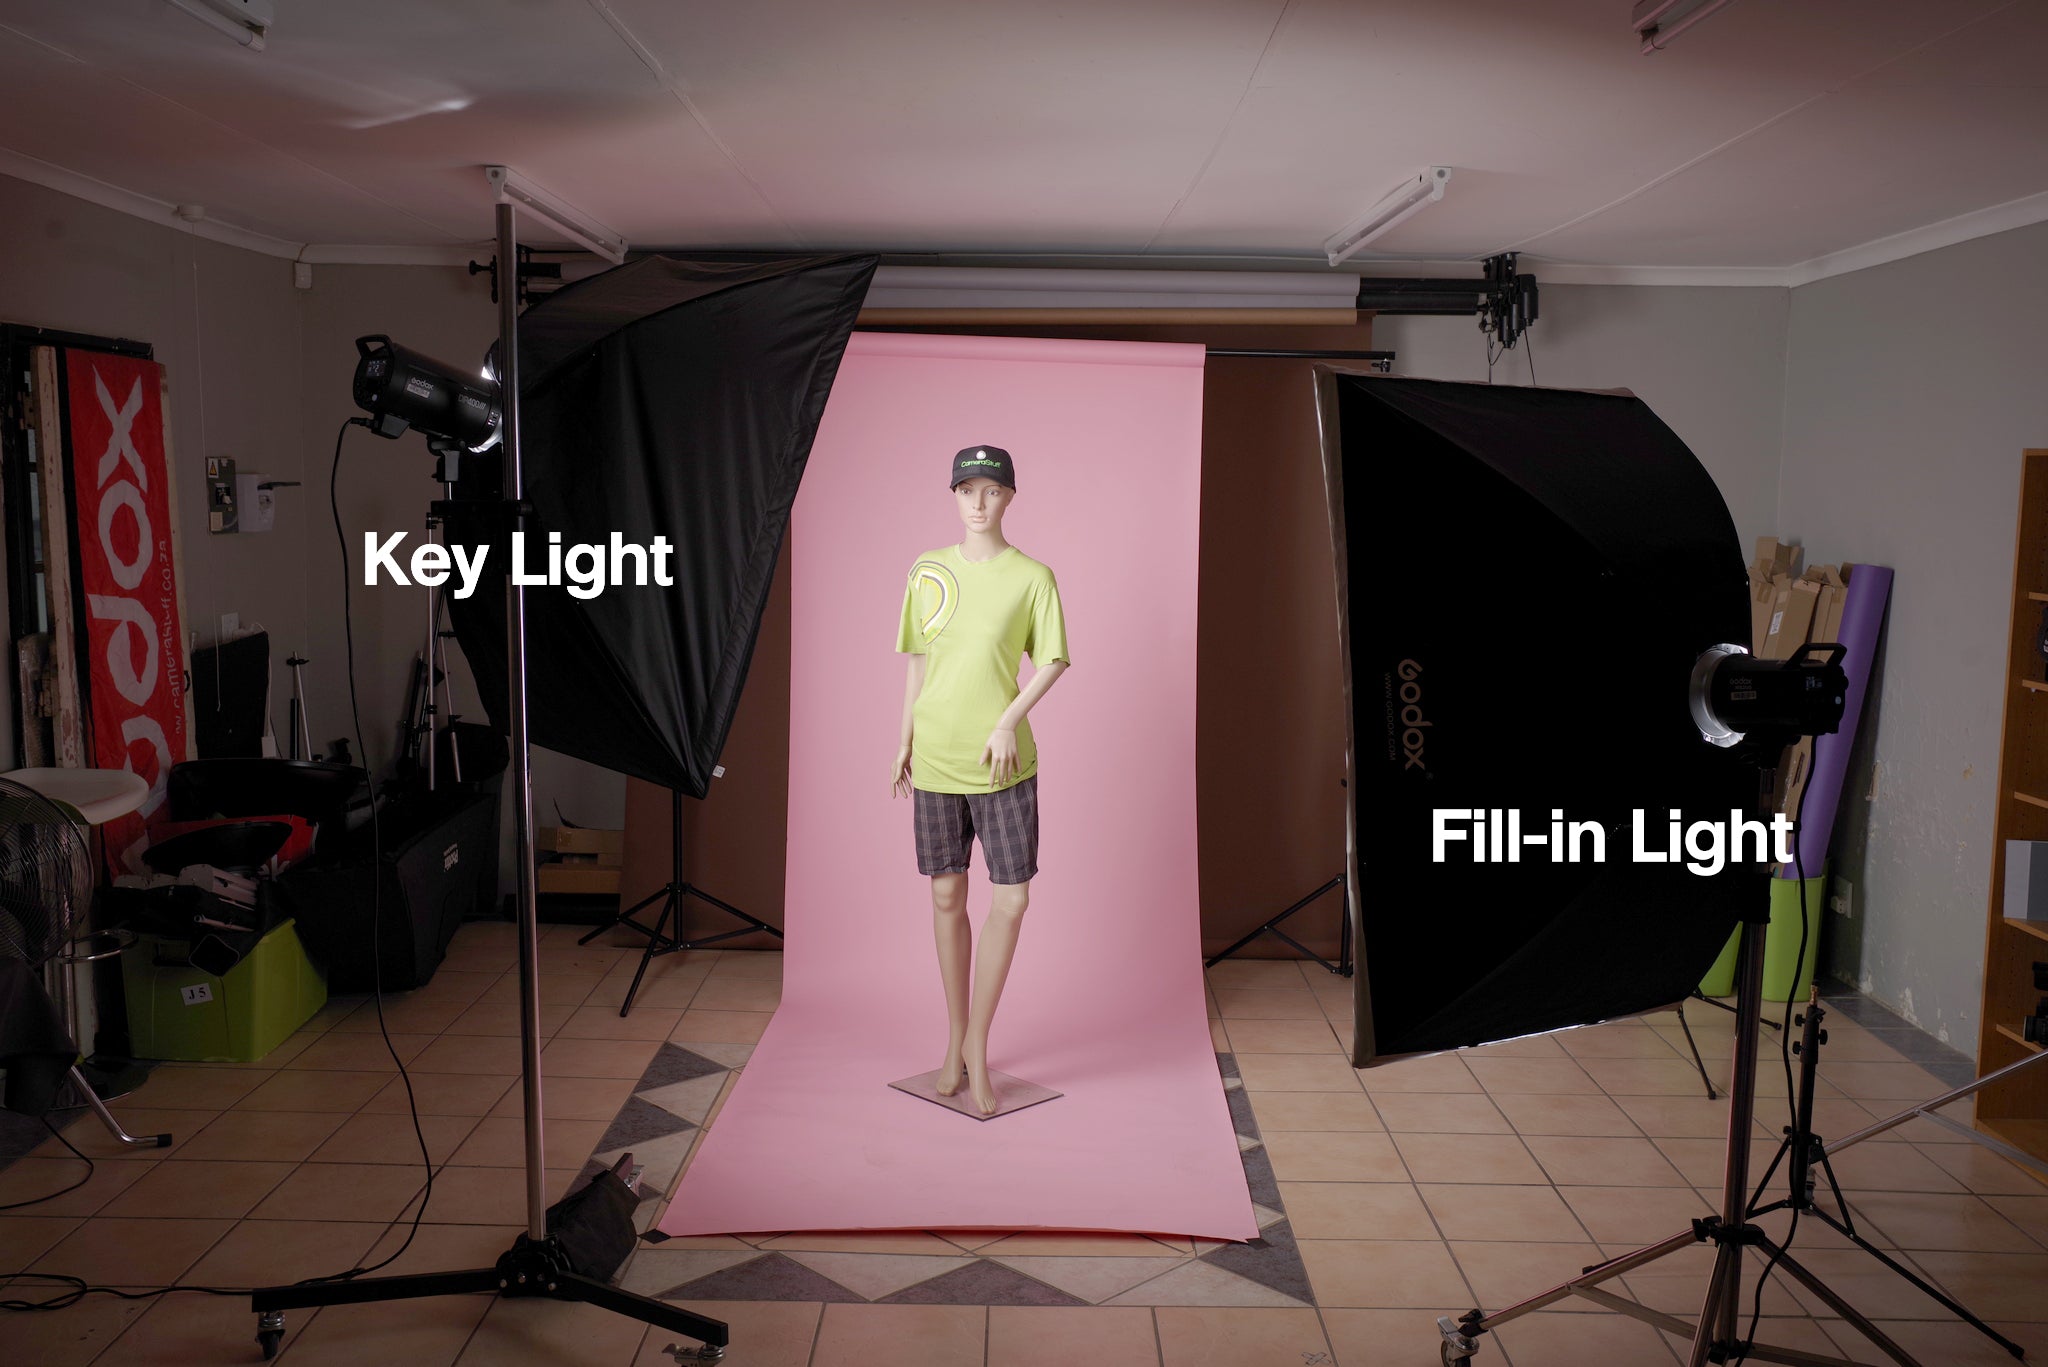
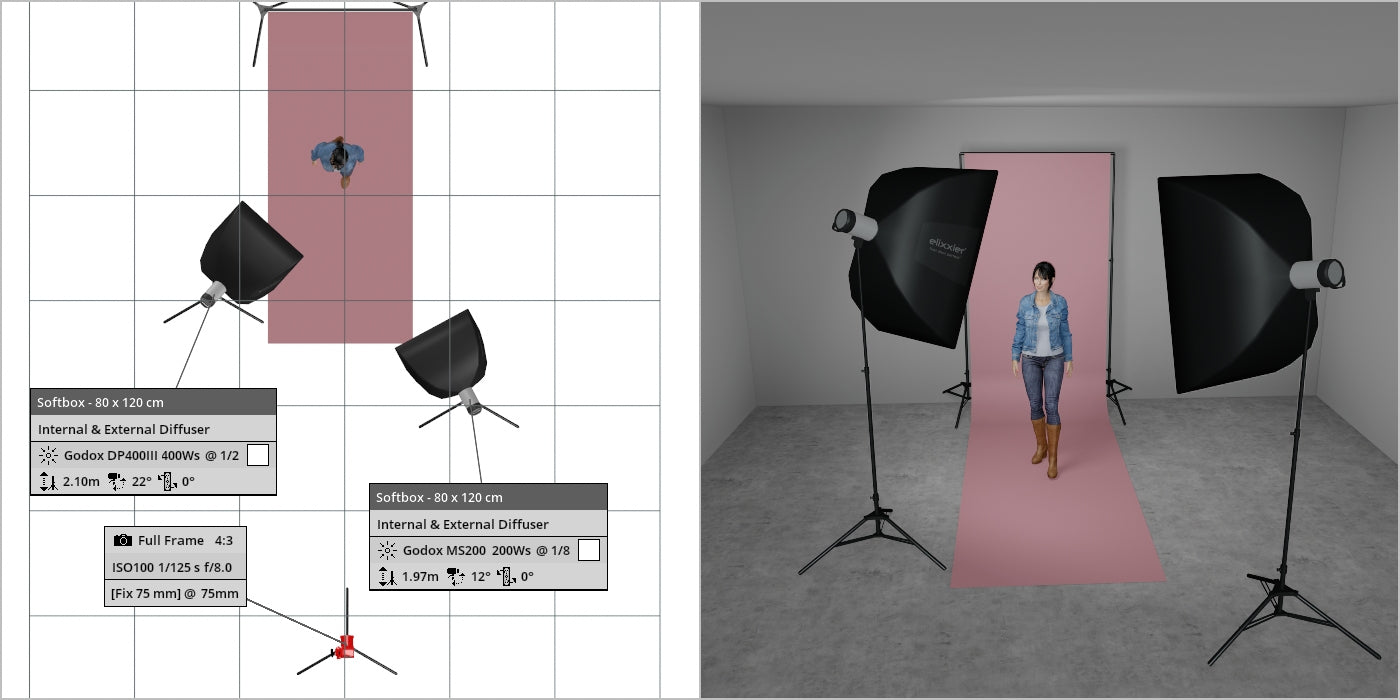
Here she stands on a 1.34x11m Coral Pink Backdrop. One of our favourites! We used a Godox DP400III with 80x120cm Softbox as a Key Light and a Godox MS200, also, with 80x120cm Softbox as a Fill-In Light.
Camera Settings:
ISO 100
F8.0
1/125
Flash Settings:
Key: 1/2
Fill: 1/8
The Results
We can see that the backdrop is too skinny and thus, the rest of the studio is getting in the shot. Also, the softbox has sneaked into the frame, but not to worry—removing it is a breeze

Let's start the process with Photoshop's AI Generative Fill
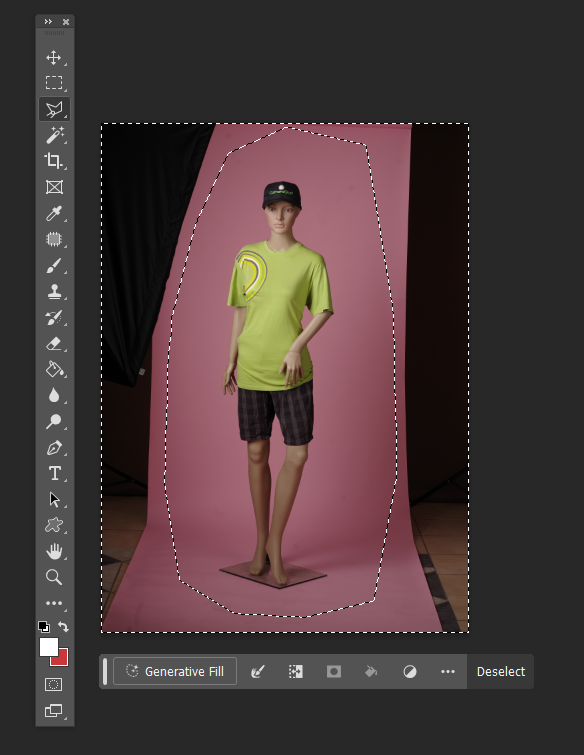
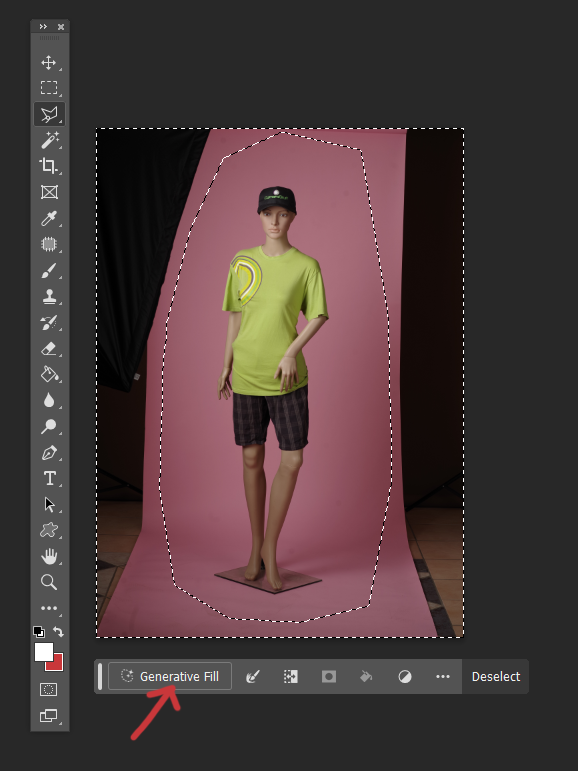
First, we need to use a Selection tool, such as the Lasso or Polygonal Lasso Tool. Select an area around your subject. Make sure not to select any of the unwanted bits.
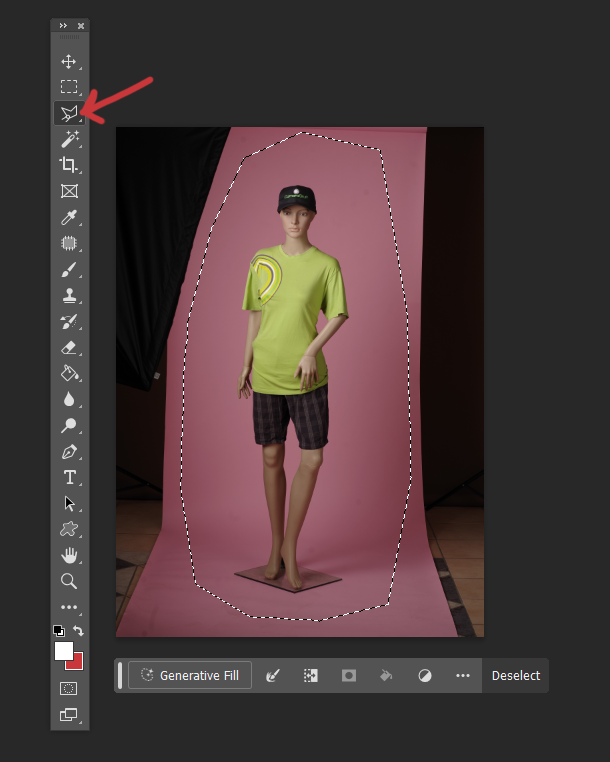
Inverse the selection by pressing CTRL + I
Click on Generative Fill
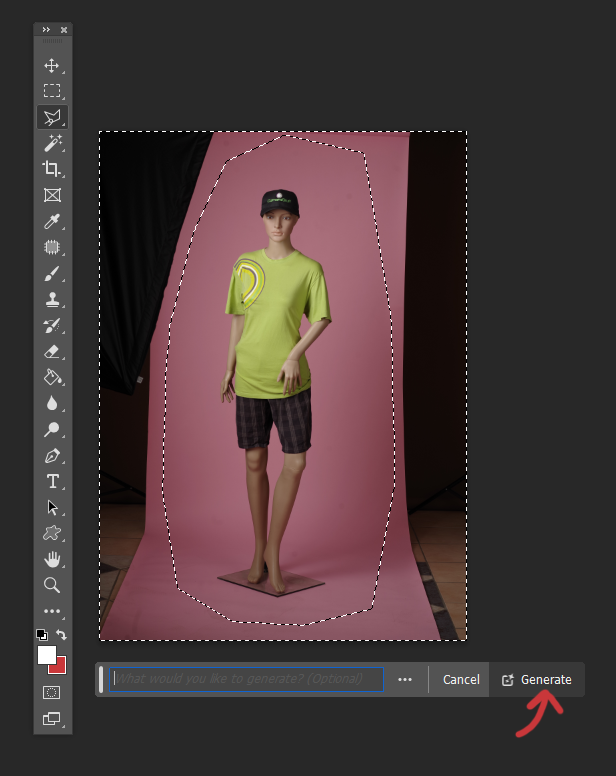
Leave the prompt empty. Click on Generative – and let Photoshop do its magic.
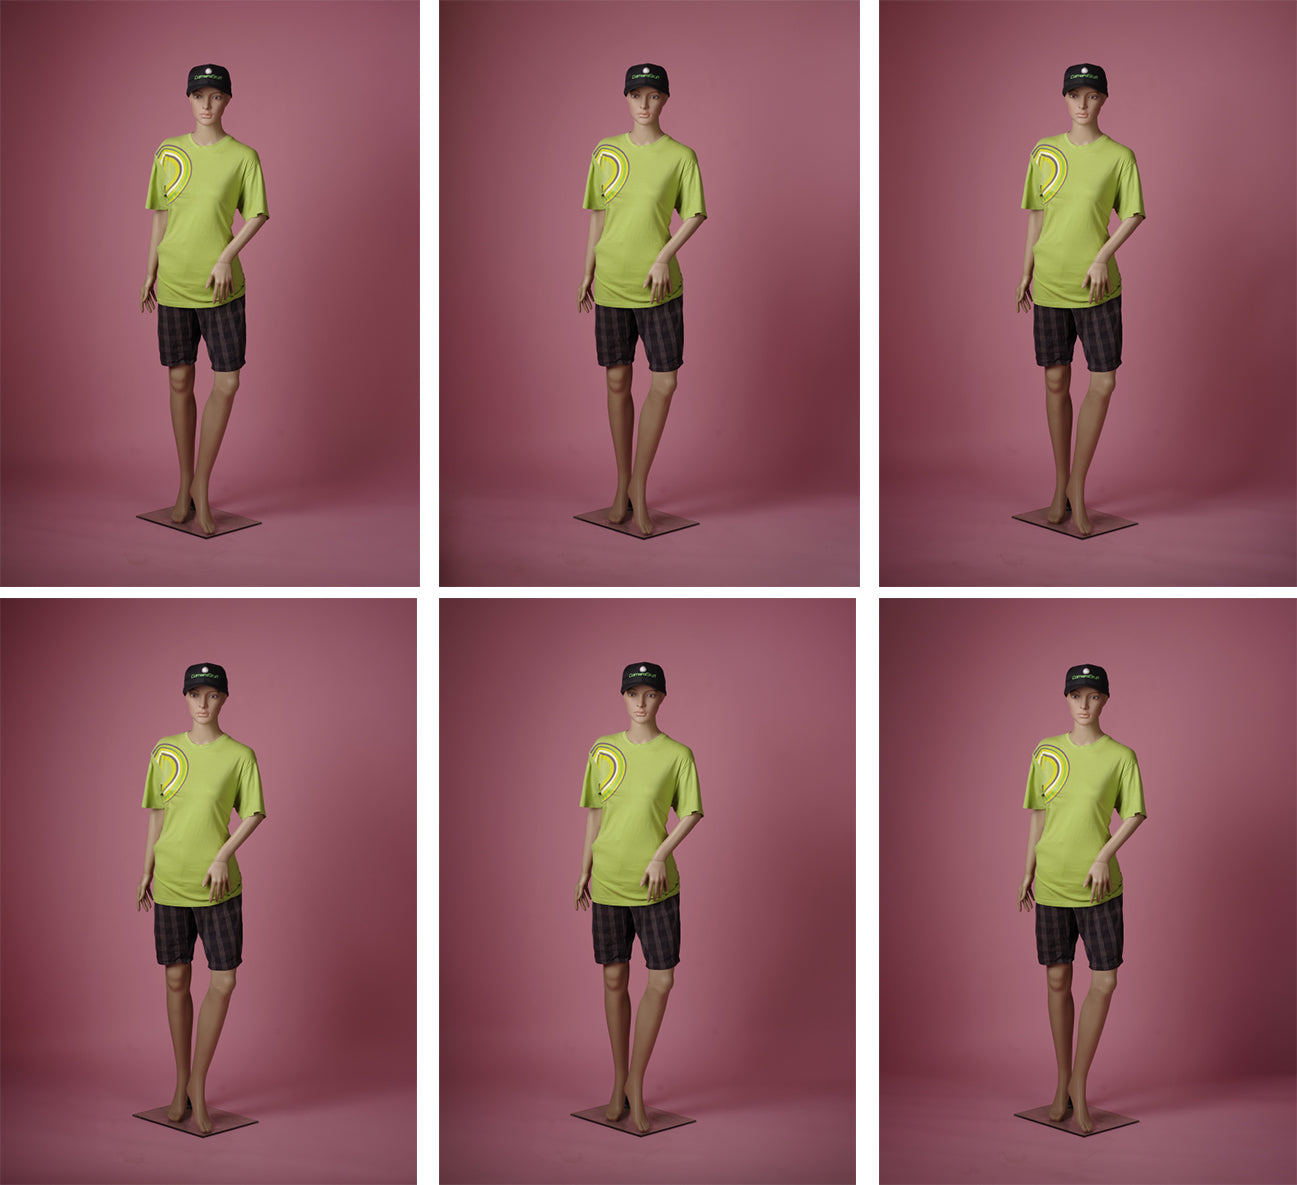
Mixed Results
Initially, you will receive three options. There might be some inconsistencies in certain results. If none of them meets your satisfaction, feel free to click on the Generate button once more.
Following that, you can perform minor touch-ups, such as removing sensor dust (I need to clean my sensor at some point) and wrinkles from the backdrop, to enhance the cleanliness of the background.

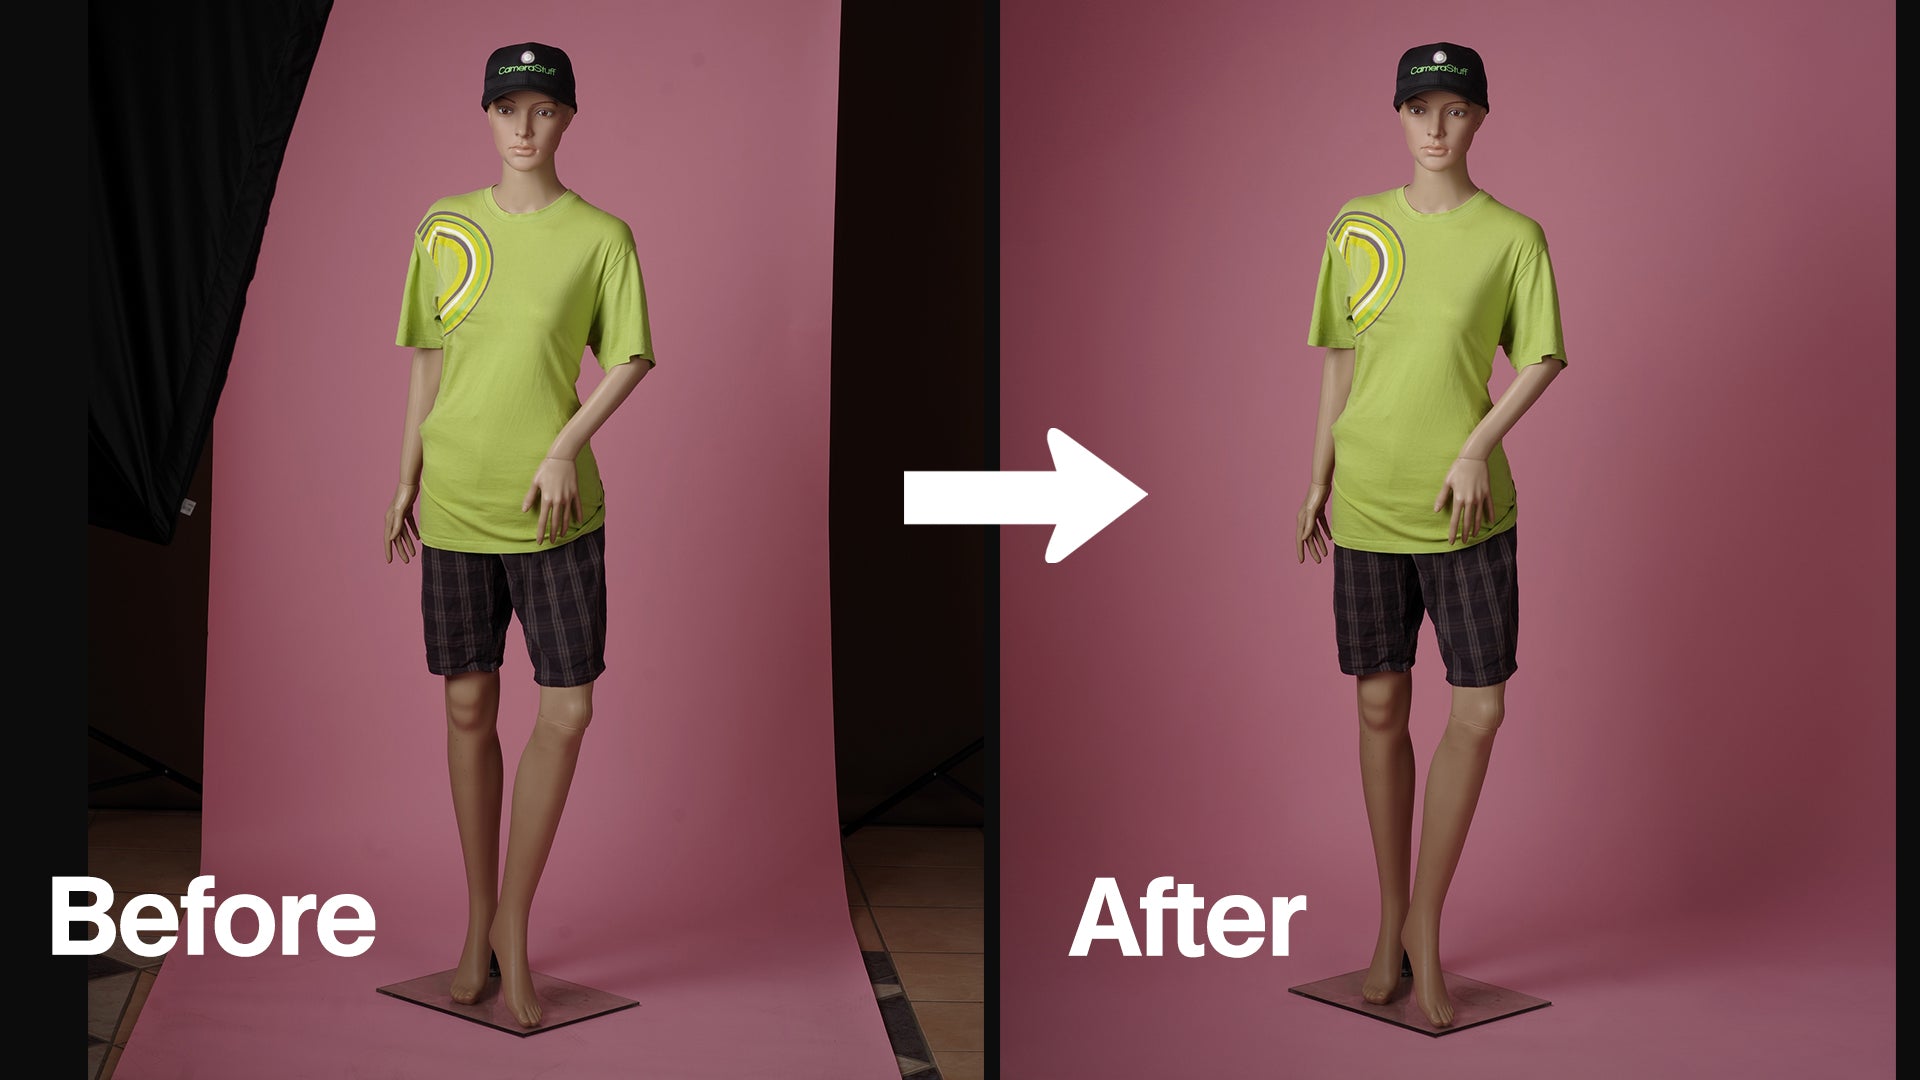
There you go!
The entire process took me no more than 5 minutes. Thanks to Photoshop's Generative Fill feature, extending our studio backdrops to occupy the entire frame has become a straightforward task.
Undoubtedly, the process becomes notably simpler when starting with a larger backdrop. However, choosing smaller backdrops not only presents a more budget-friendly option but also offers increased convenience for travel and storage.


Comments (0)
There are no comments for this article. Be the first one to leave a message!